


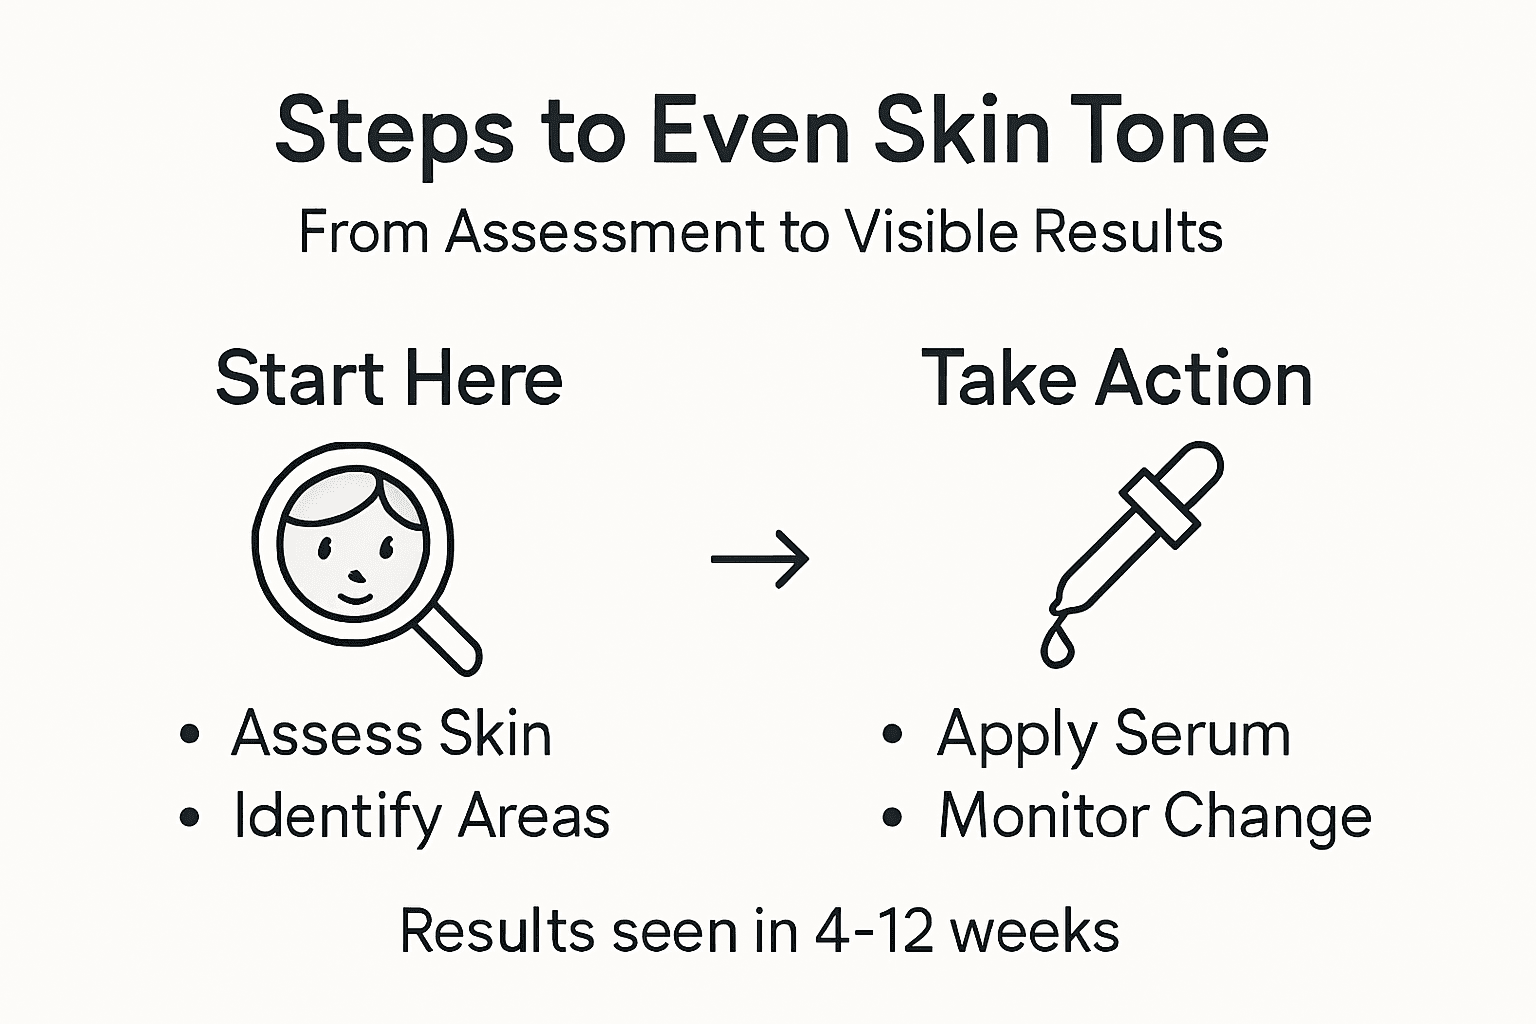
Step-by-Step Guide to Even Skin Tone for Radiant Results
Finding the right approach for uneven skin tone can feel overwhelming when every mirror reflects shifting shades and new marks. Women across North America and Europe know how these changes can affect confidence and routines. With step-by-step guidance rooted in scientific recommendations, you will discover consistent assessment and targeted treatment strategies that help you track, treat, and transform your skin for visible improvement.
Table of Contents
- Step 1: Assess Your Current Skin Concerns
- Step 2: Choose Targeted Serums For Discoloration
- Step 3: Apply Treatments Consistently With Proper Technique
- Step 4: Monitor Skin Progress And Adjust Routine
Quick Summary
| Key Takeaway | Explanation |
|---|---|
| 1. Assess Your Skin Properly | Use natural lighting to evaluate skin tone and texture changes accurately. |
| 2. Choose Targeted Serums | Select serums based on specific discoloration concerns for optimal results. |
| 3. Apply Consistently with Care | Proper application technique is crucial for effective use of serums. |
| 4. Track Progress Regularly | Take photos and note changes to objectively monitor your skin improvement. |
| 5. Adjust Routine as Needed | Be flexible and refine your skincare routine based on your skin’s response. |
Step 1: Assess your current skin concerns
Before you can tackle uneven skin tone, you need a clear picture of what you’re working with. This assessment becomes your baseline, the reference point you’ll return to as your skin improves over the coming weeks and months.
Start by examining your skin in proper lighting. Natural daylight from a window works best, though a well-lit bathroom with good overhead lighting also helps. Avoid fluorescent lighting, which can distort what you see. You’ll want to use mirrors strategically.
Gather these simple tools:
- One full-length mirror for overall assessment
- A handheld mirror for close-up inspection
- Good lighting (natural daylight preferred)
- A quiet moment when you’re not rushed
Now, systematically scan your entire face. Performing thorough self-examinations helps you identify patterns you might otherwise miss. Look for areas where your complexion appears darker, lighter, or more reddened than surrounding skin.
Pay special attention to common problem zones. Your cheeks, nose, and forehead often show the most noticeable discoloration. The jawline and neck frequently reveal sun damage or hormonal patterns. Don’t skip your temples and the area around your eyes, where age spots and uneven pigmentation commonly develop.
Document the specific areas where tone inconsistency bothers you most—this clarity guides your skincare strategy.
As you assess, note more than just discoloration. Observe texture changes, areas of increased redness, or spots that appear raised or sunken. Understanding whether your concern is purely pigmentation or involves texture helps determine the right approach.
Consider what causes uneven skin tone in your case. Did sun exposure create these patterns? Are they hormonal? Age-related? This context informs whether you’re addressing hyperpigmentation, redness, or loss of luminosity.
Here’s a concise comparison of common causes and their typical signs for uneven skin tone:
| Cause of Uneven Tone | Common Signs | Typical Affected Areas |
|---|---|---|
| Sun exposure | Brown spots, roughness | Cheeks, forehead, jawline |
| Hormonal changes | Patchy darkness, melasma | Temples, upper lip, cheeks |
| Post-inflammation | Red/brown spots, marks | Previous breakout locations |
| Aging | Dullness, age spots | Around eyes, neck, hands |
| Sensitivity/reaction | Redness, blotchiness | All facial zones possible |
Take a photo in consistent lighting. Store it somewhere safe. You’ll compare this image against future photos to track progress objectively. Many women find this visual evidence more convincing than what they observe daily in the mirror.
Pro tip: Take your assessment photo at the same time of day under identical lighting conditions each week—this removes variables and shows real change rather than lighting tricks.
Step 2: Choose targeted serums for discoloration
Now that you’ve assessed your skin, it’s time to select serums specifically formulated to address the discoloration you identified. The right serum becomes the workhorse of your brightening routine, targeting the pigmentation concerns that matter most to you.

Understand what type of discoloration you’re treating. Dark spots from sun damage behave differently than post-inflammatory hyperpigmentation left behind after breakouts or irritation. Postinflammatory hyperpigmentation occurs when inflammation triggers excess melanin production, while UV-induced spots develop over years of cumulative sun exposure. Knowing which you’re addressing helps you choose more effectively.
Look for serums with proven lightening agents. The most effective options for your age group include:
Use this summary to help select a serum best suited to your skin concern:
| Ingredient | Main Benefit | Best For |
|---|---|---|
| Tranexamic acid | Reduces redness, lightens darks | Post-inflammatory marks |
| Peptides | Supports barrier, evens tone | Aging or fragile skin |
| Vitamin C | Antioxidant, boosts luminosity | Dullness, sun spots |
| Niacinamide | Regulates pigment, strengthens skin | General discoloration |
- Tranexamic acid for reducing redness and brightening uneven tone
- Peptides to support skin barrier health while addressing discoloration
- Vitamin C derivatives for antioxidant protection and luminosity
- Niacinamide to regulate melanin and strengthen skin resilience
When evaluating serums, pay attention to concentration levels. Higher percentages of active ingredients deliver stronger results, but your skin needs time to adapt. Start with moderate concentrations if you’re new to treatment serums, then layer in stronger formulations as your skin builds tolerance.
Choose serums designed to work together—layering complementary ingredients amplifies results without overwhelming your skin barrier.
Consider your skin type when selecting. If you have sensitive or reactive skin, avoid combining multiple brightening actives at once. If your skin tolerates treatment well, stacking serums with different mechanisms accelerates progress. Tranexamic acid peptide formulations offer a strategic combination, pairing pigmentation reduction with structural support for aging skin.
Read ingredient lists carefully. Avoid serums heavy in fragrance or essential oils, which can irritate mature skin and worsen discoloration. Opt for clean formulations that focus on active ingredients without unnecessary additives.
Start with one new serum and use it consistently for at least three to four weeks before introducing another. This approach lets you identify which ingredients your skin responds to best.
Pro tip: Apply serums to damp skin immediately after cleansing, then seal with a lightweight moisturizer—this hydration layer helps active ingredients penetrate while protecting your barrier from irritation.
Step 3: Apply treatments consistently with proper technique
Choosing the right serum means nothing without proper application. Technique and consistency determine whether your treatments deliver results or sit underutilized in your bathroom cabinet. This step transforms your skincare from random dabbing into a strategic protocol.
Start with genuinely clean skin. Cleanse thoroughly but gently, removing all makeup, sunscreen, and daily grime. Pat your face dry with a soft towel, but leave skin slightly damp. This moisture creates the ideal canvas for serum absorption and minimizes irritation from active ingredients.
Consistent application with correct techniques maximizes efficacy and minimizes side effects. Follow this simple application sequence:
- Dispense a pea-sized amount of serum onto clean fingertips
- Gently press the serum into your skin using light tapping motions
- Focus on problem areas first, then work outward across your entire face
- Wait one to two minutes for the serum to absorb
- Follow with your moisturizer to seal in the treatment
Avoid common mistakes that undermine results. Don’t scrub or massage aggressively, which irritates mature skin and can deepen discoloration. Don’t use too much product hoping for faster results. Don’t skip days, thinking occasional use will work as well as consistent application.
Consistency matters more than quantity—daily application of the right serum outperforms sporadic heavy application every single time.
Timing is critical. Apply treatments at the same time each day, ideally at night when your skin naturally repairs itself. Morning application works too, but always follow with broad-spectrum sunscreen during the day. Gentle application techniques and consistent routines produce the best outcomes for improving discoloration over time.
Track your application in a simple way. Mark your calendar when you use your treatment serum. This visual accountability keeps you consistent and helps you notice patterns if results slow.
Expect results in four to twelve weeks depending on serum strength and your individual skin response. Discoloration fades gradually, not overnight. Stay committed through the full cycle before assessing effectiveness.
Pro tip: Use your non-dominant hand to apply serums to avoid unconscious pressure variation—this ensures even distribution and consistent results from application to application.
Step 4: Monitor skin progress and adjust routine
Your skin doesn’t respond to treatments in a straight line. Progress plateaus, unexpected reactions happen, and what worked beautifully last month might need tweaking now. Monitoring lets you stay responsive rather than blindly following the same routine indefinitely.
Create a simple tracking system. Use your phone’s camera to capture progress photos every two weeks under consistent lighting and time of day. These images reveal changes your mirror might miss, especially subtle improvements in tone evenness and radiance. Comparing week two to week six provides concrete evidence of whether treatments are working.
Beyond photos, observe changes in skin tone and texture regularly to assess treatment response. Track these specific markers:
- Spot lightening or darkening
- Changes in skin texture or roughness
- New redness or persistent irritation
- Overall brightness or luminosity shifts
- How your skin feels (dry, balanced, dewy)
Document any reactions honestly. If you notice irritation, redness that won’t fade, or increased sensitivity, your routine needs adjustment. This isn’t failure. It’s valuable information guiding you toward what your skin actually needs right now.
Skin changes with seasons, stress, and hormones—flexibility in your routine keeps results consistent year-round.
After four to six weeks of consistent use, assess your results objectively. Are problem areas noticeably lighter? Is your complexion more even? If yes, stay the course. If progress stalls, adjust your skincare regimen strategically by changing application frequency, rotating products, or adding complementary treatments rather than abandoning your approach entirely.
Know when to introduce new elements. If results plateau after eight weeks, your skin may need a stronger active ingredient or a different mechanism of action. If irritation develops, dial back frequency or concentration before quitting entirely.
Don’t expect perfection. Mature skin with years of sun exposure won’t achieve perfect uniformity, but substantial improvement is absolutely achievable. Realistic expectations keep you committed through the timeline it actually takes.
Pro tip: Save your two-week progress photos in a dedicated folder and look at them monthly rather than constantly—this prevents discouragement from daily fluctuations and reveals genuine progress patterns.
Achieve Even Skin Tone with Targeted Science-Backed Solutions
Uneven skin tone can feel frustrating to address but with the right knowledge and approach it is possible to see real transformation. This article breaks down key challenges like discoloration and texture changes and highlights the importance of consistent application of serums with ingredients such as tranexamic acid and peptides. If your goal is to brighten and rejuvenate your complexion while repairing skin at the cellular level Cellure offers advanced formulations designed specifically for this purpose.
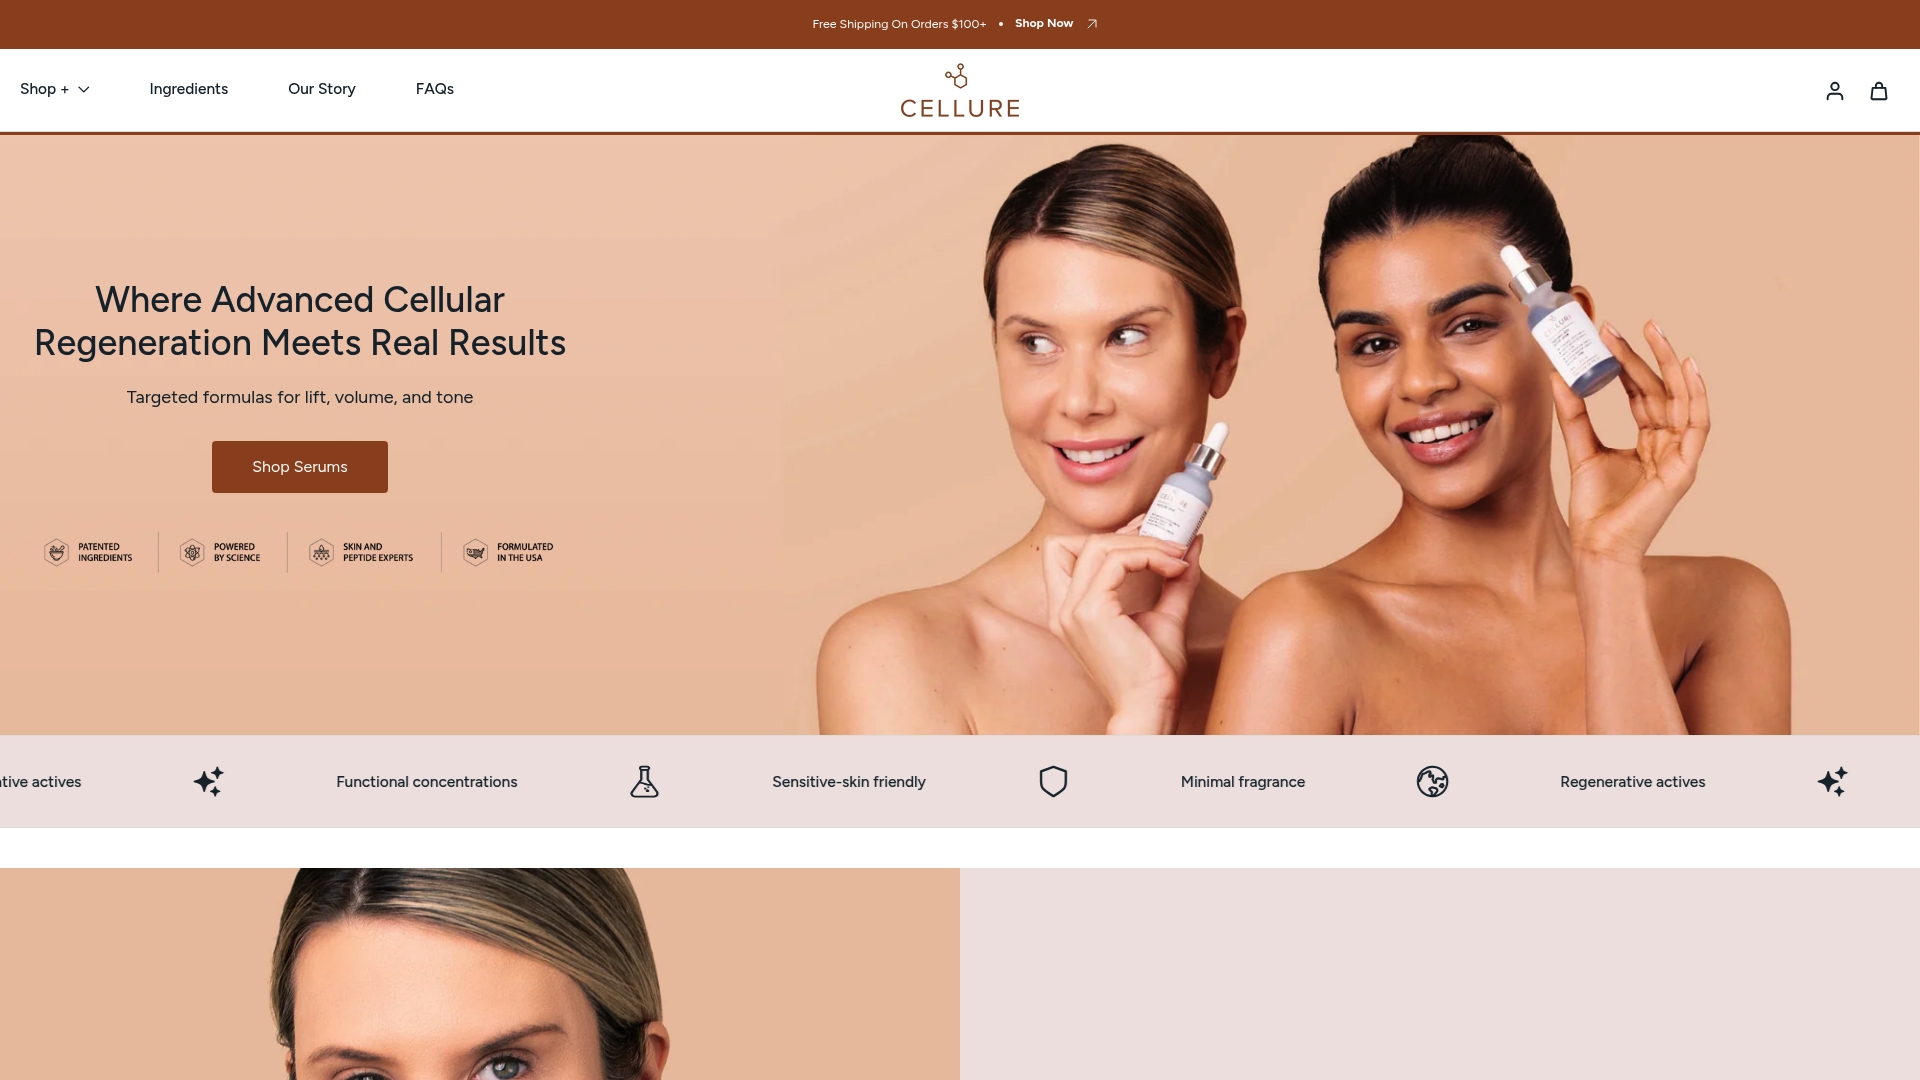
Explore our Homepage – Cellure to discover serums clinically formulated for brightening and evening tone. For proven favorites that blend potency with gentle care visit our Best Sellers – Cellure. Start your journey now with products crafted to support your skin’s renewal and enjoy visible results with dedicated use. Don’t wait for the perfect moment when visible radiance and confidence can begin today at https://cellure.co.
Frequently Asked Questions
How do I assess my current skin tone to identify discoloration?
To assess your current skin tone, examine your face in natural light using both a full-length mirror and a handheld mirror. Document specific areas of uneven tone and texture, which will help guide your skincare strategy moving forward.
What types of serums should I use to target uneven skin tone?
Choose serums with proven lightening agents like Tranexamic Acid, Vitamin C, or Niacinamide, depending on your specific concerns. For example, Tranexamic Acid is effective for post-inflammatory marks, while Vitamin C helps brighten dullness.
How should I apply my chosen serum for the best results?
Apply a pea-sized amount of serum onto slightly damp skin, using light tapping motions to gently press it into problem areas. Follow up with a lightweight moisturizer to seal in the treatment for optimal absorption and protection.
How often should I monitor my skin’s progress?
Monitor your skin’s progress every two weeks by taking photos under the same lighting conditions. This will allow you to see subtle changes over time and determine whether your skincare routine is effective.
What should I do if I experience irritation from a new serum?
If you experience irritation, reduce the frequency of application or lower the concentration of the active ingredient. You may also consider stopping the application until your skin stabilizes, before reintroducing the product gradually.
When can I expect to see results from my skincare routine?
Expect to see improvements in your skin tone within four to twelve weeks, depending on the active ingredients and your skin’s response. Stay consistent with your regimen, and track progress to keep your motivation high.
Recommended
- Why Target Uneven Skin Tone for Radiant Aging – Cellure
- Why Skin Tone Becomes Uneven – Causes and Solutions – Cellure
- TRANEXAMIC ACID PEPTIDE SERUM – Cellure
- 6 Top Skin Repair Ingredients and How They Work for You – Cellure
- Step by Step Chemical Peel Guide for Glowing Skin - The Aesthetics Room
- 6 Essential Types of Skincare Treatments for Radiant Skin
Share